AVACON WEBSITE
Page Sections
ABOUT THE AVACON PUBLIC WEBSITE
The public AvaCon website is located at http://avacon.org, which automatically redirects to the subdirectory http://avacon.org/blog, and we use the WordPress platform and the Enfold theme.
In your Onboarding process, you should have received a username and password to log into the Admin Dashboard of the AvaCon website.
Admin Login: http://avacon.org/blog/wp-admin
Username: (typically your first name)
Password: (some default password that you need to change)
Introduction to WordPress Dashboard
When you log into the Admin Dashboard for the first time, please make sure to go in and change your password!
Because we have installed several Plugins and use the Enfold theme, you will see additional options on the Dashboard menu that don’t appear in these tutorial videos. Don’t worry, we’ll talk more about those custom features later.
Posts vs. Pages
It’s good to know the different between Posts and Pages in WordPress before we go any further.
Using the Enfold Theme on AvaCon’s Site
Because we use a commercial theme for our site, called Enfold, we have more layout and functional options on our website than what comes with a stock out-of-the-box WordPress installation. The next sections will talk about how AvaCon uses its site specifically. But before we continue, you may wish to take a look at the Enfold Demo Site to get a sense of how Enfold works. Click on the various headers at the top of the demo site to see the various features included with Enfold.
AvaCon’s Home Page
AvaCon’s front home page is a relatively static page that doesn’t change very often. It’s not likely that you will be asked to change or edit the front page, unless you are on the web development or graphic design team. You should, however, familiarize yourself with the main navigation menus on our front page so you get a sense of how we organize our content. Note that some of the main menu items have sub-menus that link to specific pages.
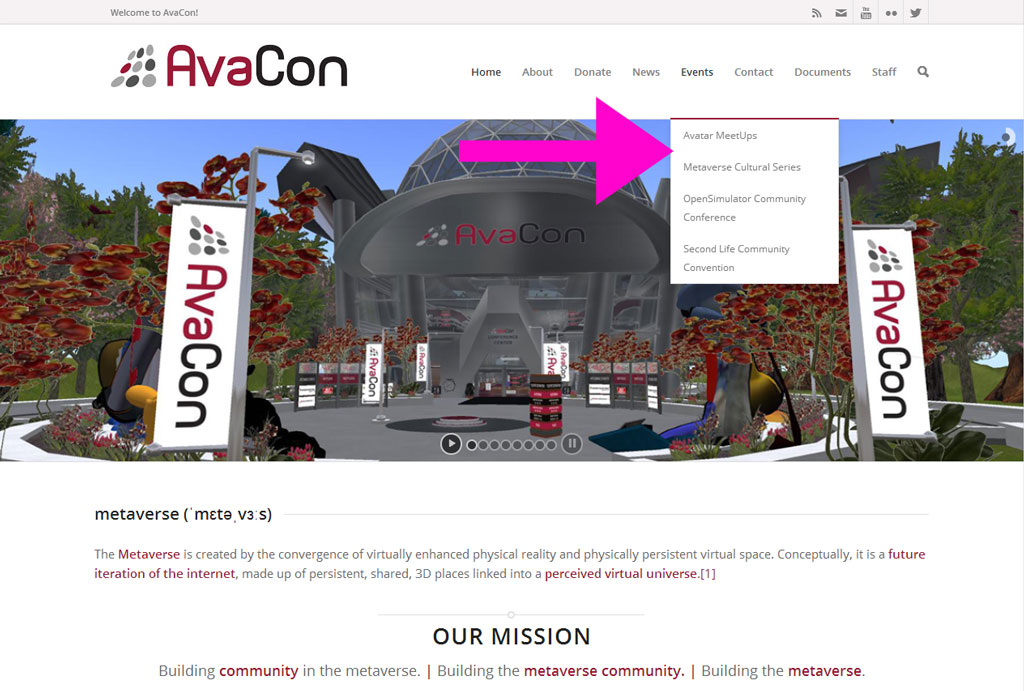
If you scroll down, you’ll also see that most of the content on the main page is descriptive about AvaCon’s activities, programs, and events. These areas of the page rarely change, rather, we add new updates to the content on the various sub-pages for each of those activities or events.
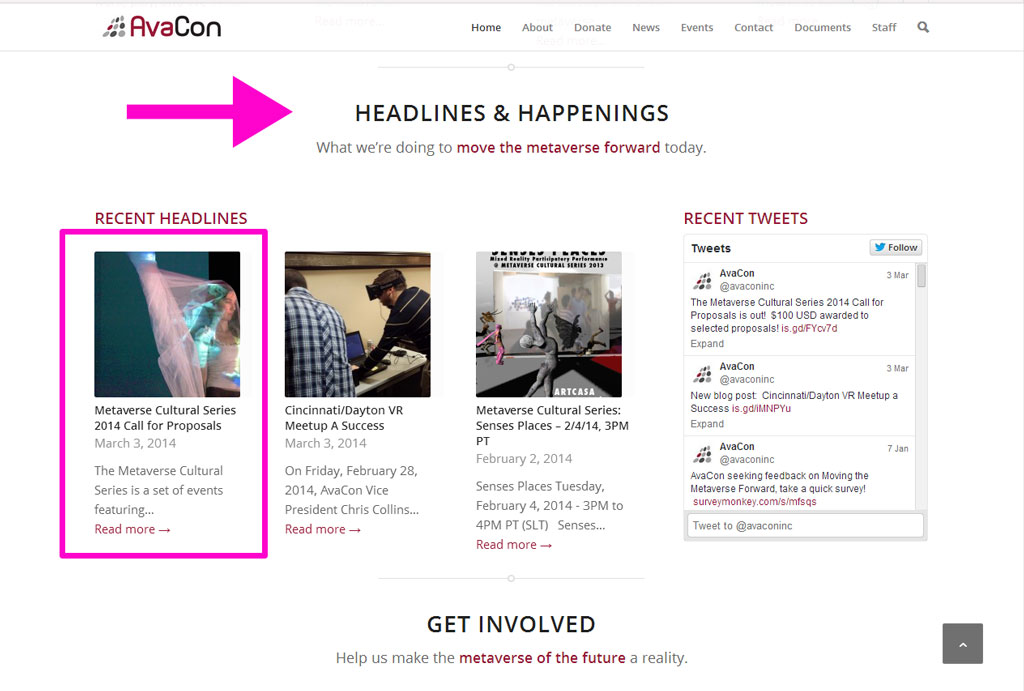
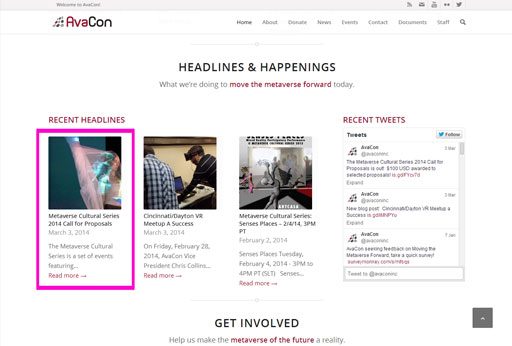
The only part of the page that dynamically adds content is the “Headlines & Happenings” section, which automatically imports the six most recent blog posts (which we call News in the main menu) and displays them from most recent to oldest. When you create a blog post, your post will automatically display under the Recent Headlines sections on the front page.
Creating a Blog Post
The most likely way you might add content to the AvaCon website is to add a new blog post. The steps to do this are pretty simple! Go to the Dashboard > Posts > Add New. In the next screen, you can enter in your text, images, video, or whatever other content may be needed. The editor works very similarly to a Word document, just highlight the text you want to bold, for example, and click the B bold icon.
Make Sure to Set a Category
When you’re finished writing your post, it’s important to make sure you always add your post to a Category so the post will display properly in other sections of the site. For example, if your post is about an Event, make sure to check the Event category checkbox.
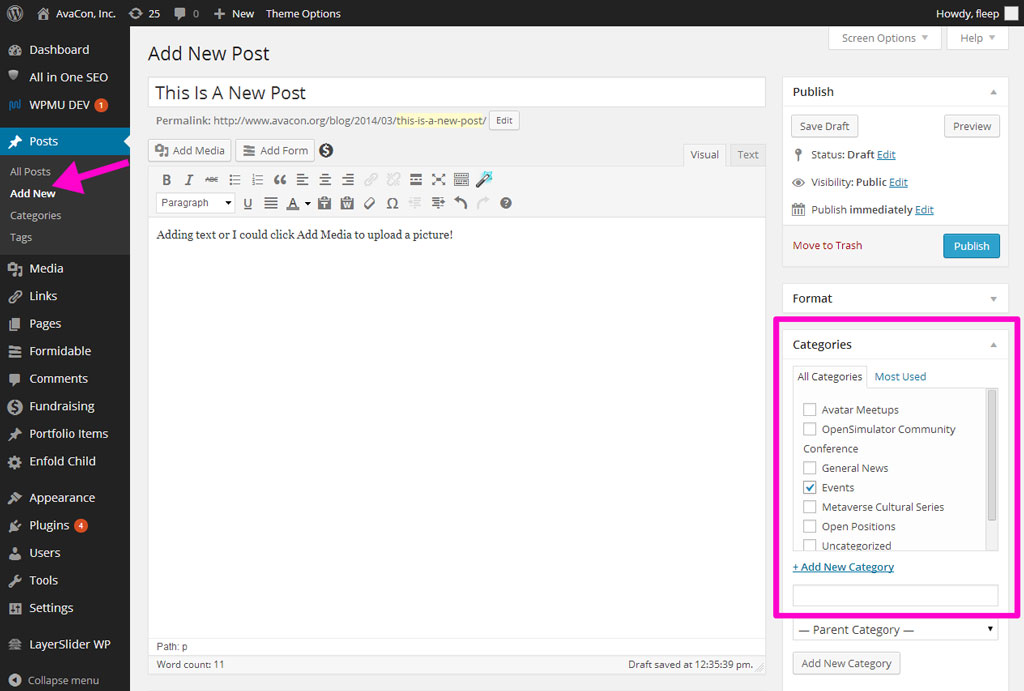
Then when you publish the post, your content will appear automatically in three places: 1) Under the “Headlines & Happenings” section of the front page, 2) as a new News item on the “News” page, and 3) as a new Event on the “Event” page. By using categories, we can keep many parts of our site updated with fresh content, while only having to write and publish the content once!
Set a Featured Image
In addition to setting a Category, you also must add a Featured Image for every post in order for the post to display properly on the various pages of the site. Scroll down on the right side of the Add New Post page to find the Featured Image box, click the link, and then upload the image file.
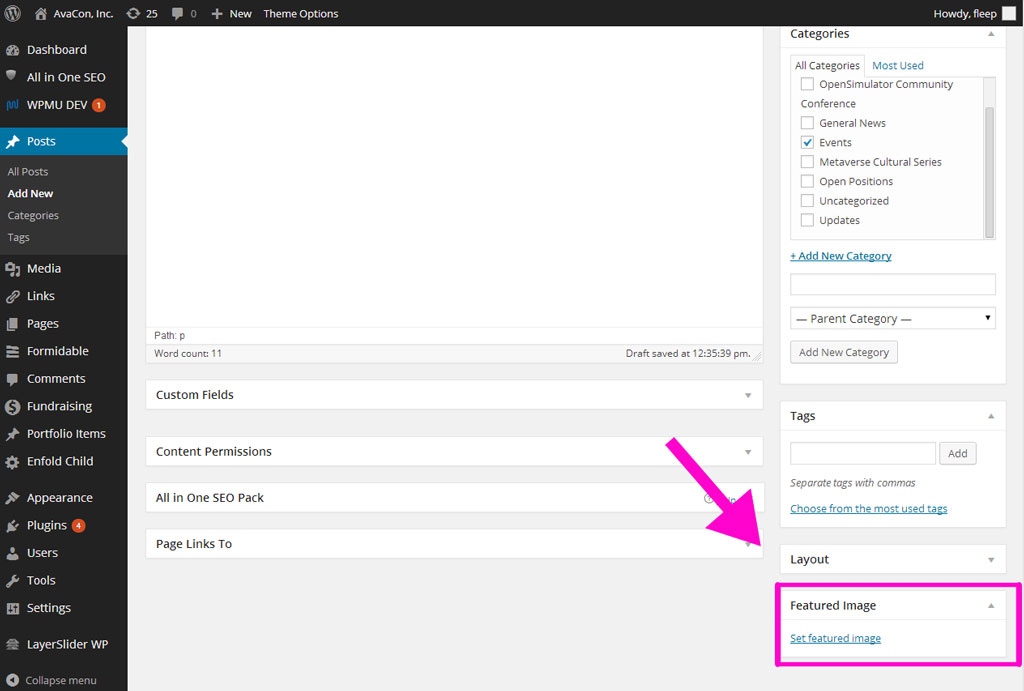
The Featured Image you select will automatically be resized to display appropriately in the various places where your post will appear on the site (which is determined by the Category you select!). So for example, if your post was categorized as an Event, the Featured Image will display differently in each of the three places where your content appears.
On the home page, the Featured Image is squarish and appears above the post title headline.
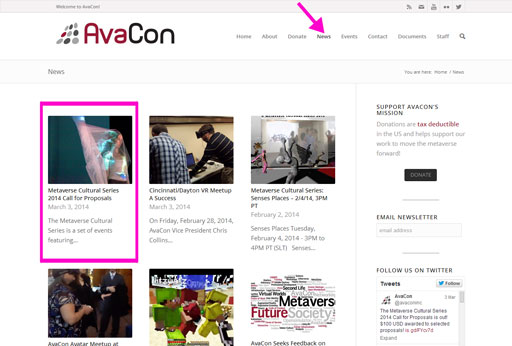
The same featured image will appear on the News page entry for your post.
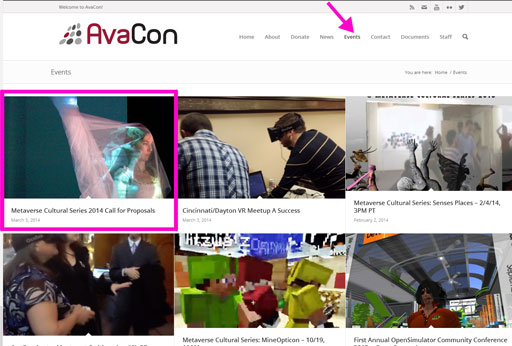
It will show up as an even larger image on the Events page entry for your post.
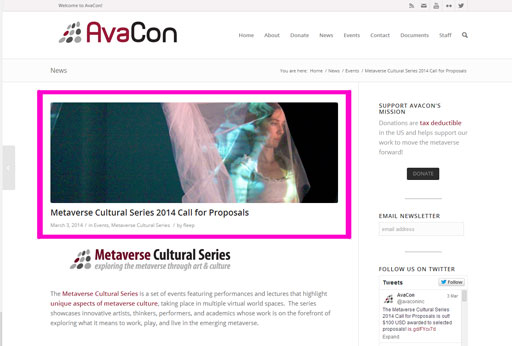
And finally, it will show up as a banner on the Post itself if anyone clicks on the entry from any of the pages.
It will take a little time and practice for you to learn all the ways that our website uses and displays content dynamically throughout the site, but the important thing to remember is that where your content will appear, and the image that is displayed, is always controlled by the Category and Featured Image you set when you first create the content. So just remember to do those two things, and your post will display beautifully in all the right places!
